 |
Homemade Accessories Creative Inspiring Ideas

How To Make a Rainbow Wind Mobile
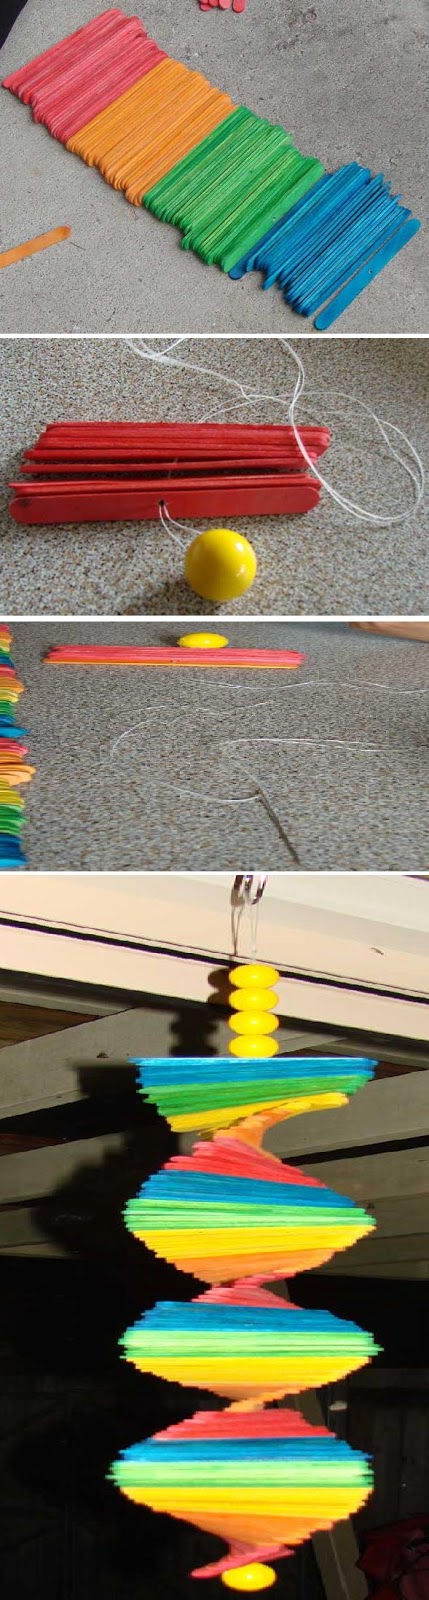 |
2. Thread a long length of dental floss through one large bead and position the bead so that it is in the middle of the dental floss.
3. Bring the two ends of the dental floss together and thread them through the needle so that the thread is now two ply thick.
4. Thread the paddle pop sticks onto the thread by pushing the needle through the holes previously drilled in the centre of the sticks. We threaded 10 sticks of each colour before moving to the next colour. However, you could do it in any colour combination that you wanted.
5. Once all the craft sticks have been threaded on, thread on the last of the beads. While we used 4, you could use as many as you want. We found out later that the beads help weigh down the top craft sticks. The craft sticks at the bottom of the mobile are held secure by the weight of the sticks above them.
6. Tie the threads together and hang up your rainbow wind mobile up.
7. Rearrange the craft sticks so they form a twisting pattern. Now enjoy the gentle motion of your mobile as it twists and turns in the breeze.
MOTHER'S DAY GIFT: DECORATED ACRYLIC BOXES

1. Spray all of the tops of the boxes in color of your choice.
2. After they have dried, find the center and drill a hole with a drill bit in the same size as the ends of your pulls. Be very careful when drilling through the plastic. You barely have to put any pressure and when it breaks through, be sure to let off so you don’t crack the plastic.
3. Use a hacksaw to cut down the end of the pull so that it is only long enough to go through the plastic and have the bolt applied to keep it in place.
4. Insert the pulls through the tops and attach bolts to secure (bolts should come w/ each pull).
A GLASS ORNAMENT DECORATED 10 WAYS BAUBLES

While looking for colored ornaments this year it seemed like all I could find were red and green mirrored shiny bulbs that didn’t quite float my boat so of course being a blogger, I decided to make my own. These are super easy and completely customizable to the colors of your choice.
All you need are some plain glass bulbs and bottles of acrylic paint.
Take off the ornament top and squeeze the paint directly into the bulb. Be generous so it covers the entire inside. Then swirl it, shake it and do a dance. Place upside down on a paper plate and let dry overnight.
Bead And Chain Bracelet DIY crafts

30cm Gold Chain (Chains with medium size links work better)
31cm Gold/Brass Jewelry Wire (I used 0.44mm size wire)
25 Gold Pearl Beads (I used 5mm size beads by Jewelry Essentials from Michael’s)
Jump-ring & Clasp
Jewelry Wire Cutter or Scissors
Pair of Jewelry Pliers
Braided T-Shirt Bracelets DIY


Subscribe to:
Posts (Atom)


